Saturday, January 17, 2015
Frame Dressing Part 2
Its been a fairly productive week. Im trying to get through all the tasks necessary to dress up frames 5 and 6. So far, this has turned out well and I am pleased with the results.


To recap; my intentions are to added dressing to the gussets on frames 5 and 6 because these are exposed in the berthing area of the boat. My thinking is that it will be easier to do this now, rather than later. I will have to be careful during construction that these areas dont get damaged, but I am confident I can get through that without any major mishaps. The frames will be encapsulated by then. This will protect the dressing work, so wiping off any epoxy drips will be fairly easy and if they are scuffed (Ill try to avoid this), I can repair the scuff with additional coats of epoxy.
Dressing up the frames consists of rounding over inner edges on the frames, adding wood veneer laminations to the gussets, and adding end caps to give rounded edges to the gussets. Last week had started adding the veneers to the gussets and had constructed the end caps for one side of frame 5 and frame 6.
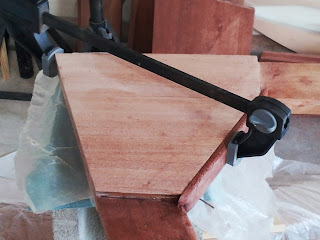
This week, Ive added the end caps for the one side of frame 5 and then cleaned them up. The following pictures show this process. Here the first end cap is being glued into position. It needs to be slightly proud of the veneer so that they can be sanded smooth after curing.

Here is the center gusset getting the same treatment.

You can see the end caps are slightly high (perhaps a bit too high on this particular gusset.

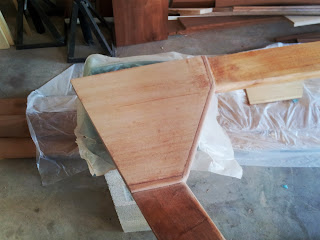
And after cleaning up the glue and sanding smooth.

One thing I found out after completing this side was that the rectangular gussets in the center were not symmetrical on opposite sides of the frame. I had to add some filler material on both ends of the gussets so that the end caps will be aligned on both sides of the frame. All of this will be hidden by the veneer, but I wish that I had thought of this when I was making the gussets earlier this year. This photo shows the filler material and some thickened epoxy. This will all be sanded to final shape before making and applying the veneer to this side.

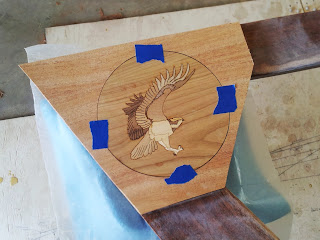
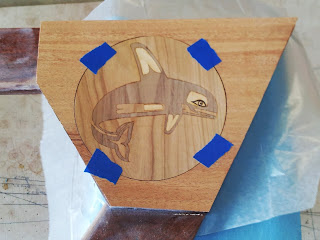
The other task that I have been working on is the wood inlay artwork for frame 6. Readers will no doubt remember the back and forth effort I have been going through on this. I decided to go with the laser cut inlay from Chesapeake Light Craft. These arrived yesterday, and Ive started getting them installed.
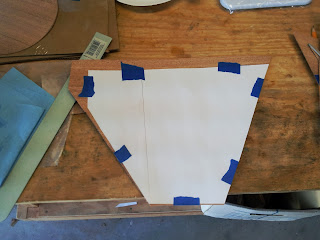
The process requires that I create the veneers and then add the inlays. Creating the veneer means making a paper template first and then transferring that to the veneer material and cutting it out.

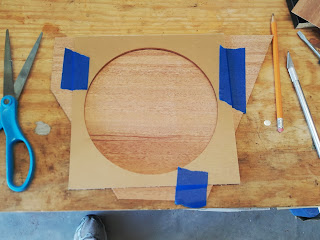
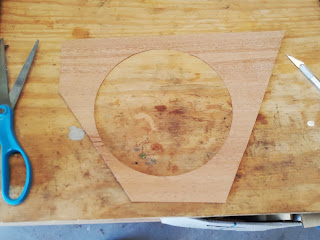
Then the inlays need to be positioned on the veneers so that the material can be cut away. This allows the inlays to lie flat with the veneer material. Chesapeake Light Craft supplied a template for cutting the circle which was easily accomplished using an X-Acto knife. I had to be sure to position the circle far enough away from the top and outside edges because there will be future construction work accomplished in those areas.


Then the inlays are laid in the circles and oriented in the desired way and taped to the veneer. And here are the two inlays taped to the veneers.


Next week, Ill describe the process of laminating them down and show the final results. I am also hoping to finish the end caps and laminations on frame 5 and then encapsulate both frames with several layers of epoxy. That should bring this phase of the project to a close.
Other work planned for this week is to purchase plywood to finish the transom frame and get that frame encapsulated as well. With a bit of luck I can get this all accomplished.
Subscribe to:
Post Comments (Atom)
No comments:
Post a Comment