Saturday, January 31, 2015
Bow Fairing Continues
I continue making slow but steady progress on the bow area of the boat. Its a continuous effort of testing the plywood, fairing either the chine, sheer, or stem in this area (a small amount), and then test fitting the plywood again. It sounds like Ive been working a lot, but in truth, this area has been somewhat of a downer and I often find my heart isnt into working it for very long. Rather than push myself to get it done, I prefer to stop when I know I dont want to work any more on it. This way I prevent the possibility of rushing something and then having to go back and fix it.
However, I also realize that I need to make some progress and get on with the rest of the build. So I have also done some additional work on fairing the keels and I I have readied the stem to accept the bow eye.
In a nutshell, the bow area chine forward of frame 6 is slightly inboard on both sides. Since both the bottom and side skins attach to the chine, they need to form a continuous flow on the outside of the skin. In fact, in this area, the two skins should appear as one continuous skin from top to bottom and the joint between the two should be flush and form a continuous surface. The illustration below shows the cross section of the sheer and the chine. The red line represents the side skin. The bottom skin would be above this and attach to the chine.
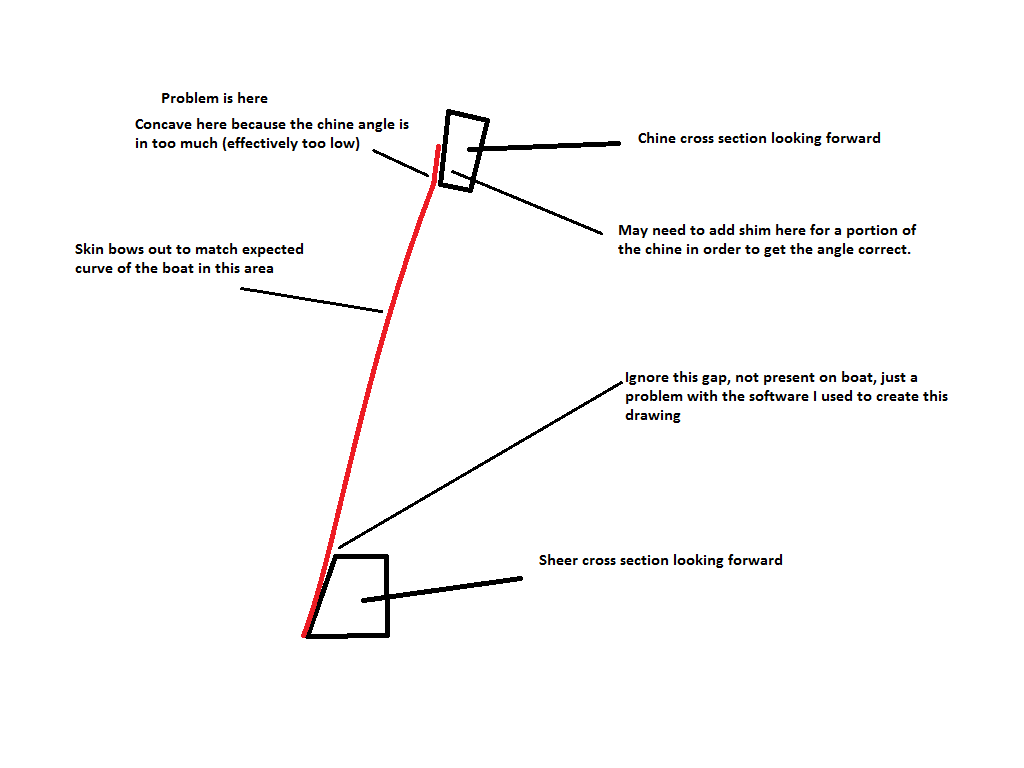 The way the chine was mounted, the joint between the two skins is slightly concave. Fortunately it is only like this forward of frame 6, but it does mean that I had to find a way to bring the chine mounting surface further outboard, This is being accomplished with some shims. But this process is complicated because the angles on the stem have not been faired yet. The sheer angles also have to be accommodated.
Therefore, I have to do a lot of cross checking before adding or removing too much material. The starboard side has been completed and I am nearly done with the port side, so soon I can move on to more productive work. Needless to say, this area of the boat is difficult to do and compounded by the lack of space I have to work on it.
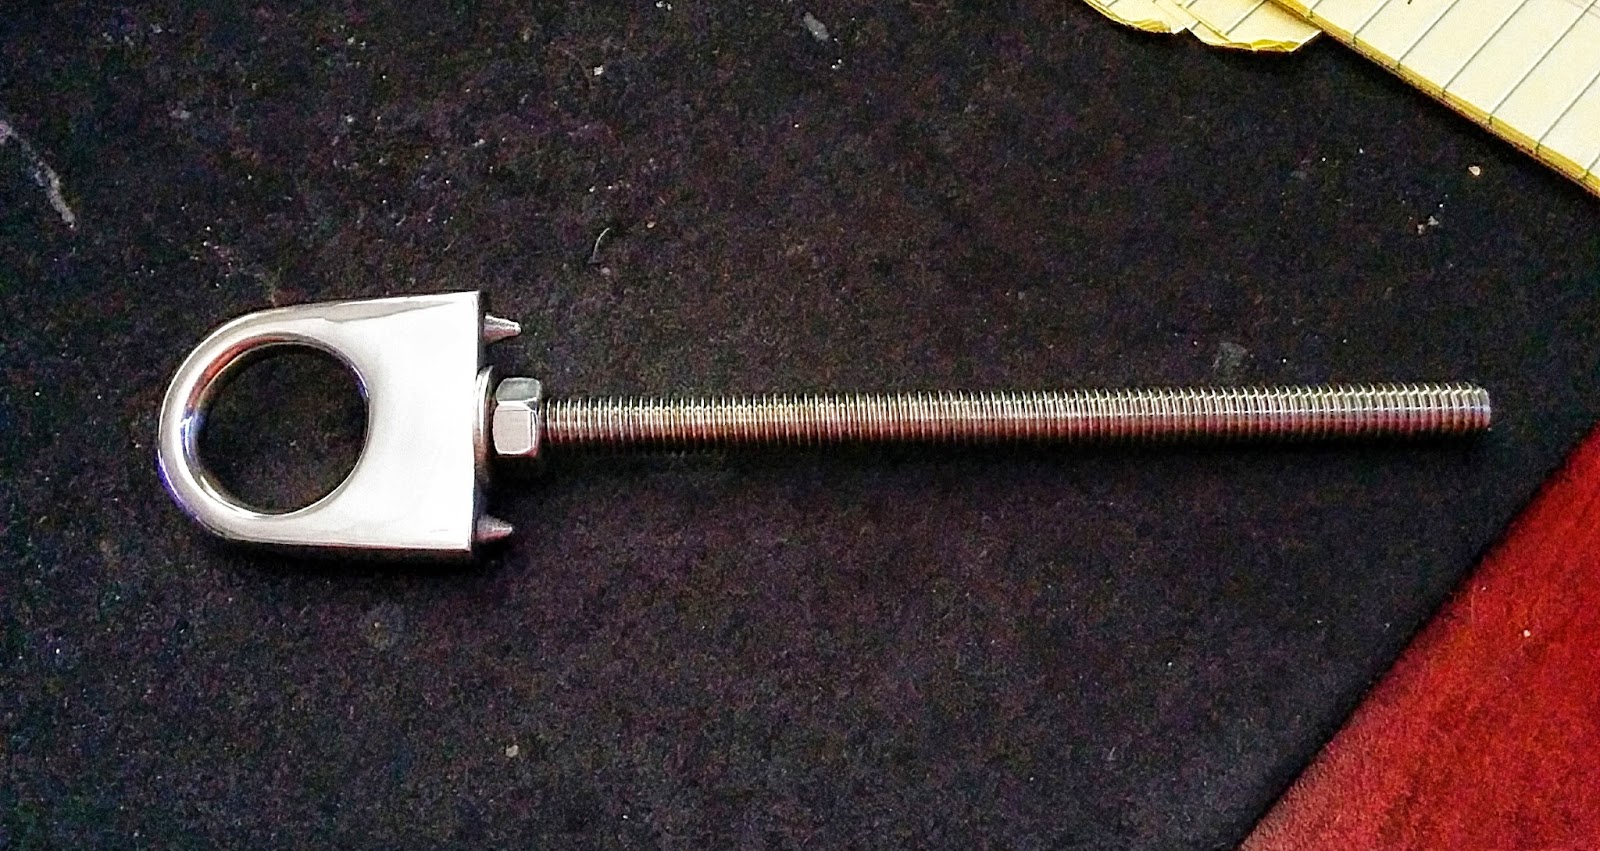
On the bow of the boat, I want to mount a bow eye for securing the boat to the trailer and for any possible towing that might be required. The bow eye is mounted using a 3/8" threaded shaft. It needs to be mounted on the bow centerline, therefore the hole needs to be drilled perpendicular to the stem and centered across the stem forward face
However, I also realize that I need to make some progress and get on with the rest of the build. So I have also done some additional work on fairing the keels and I I have readied the stem to accept the bow eye.
In a nutshell, the bow area chine forward of frame 6 is slightly inboard on both sides. Since both the bottom and side skins attach to the chine, they need to form a continuous flow on the outside of the skin. In fact, in this area, the two skins should appear as one continuous skin from top to bottom and the joint between the two should be flush and form a continuous surface. The illustration below shows the cross section of the sheer and the chine. The red line represents the side skin. The bottom skin would be above this and attach to the chine.

Therefore, I have to do a lot of cross checking before adding or removing too much material. The starboard side has been completed and I am nearly done with the port side, so soon I can move on to more productive work. Needless to say, this area of the boat is difficult to do and compounded by the lack of space I have to work on it.
On the bow of the boat, I want to mount a bow eye for securing the boat to the trailer and for any possible towing that might be required. The bow eye is mounted using a 3/8" threaded shaft. It needs to be mounted on the bow centerline, therefore the hole needs to be drilled perpendicular to the stem and centered across the stem forward face

Since the forward face of the stem will eventually be faired to a sharp angle, I felt it was necessary to drill the hole before fairing the stem. After the fairing is completed and the skins are attached and fiber-glassed, I can go back through the hole from the inside of the stem. After the boat is painted I can then mount the bow eye.
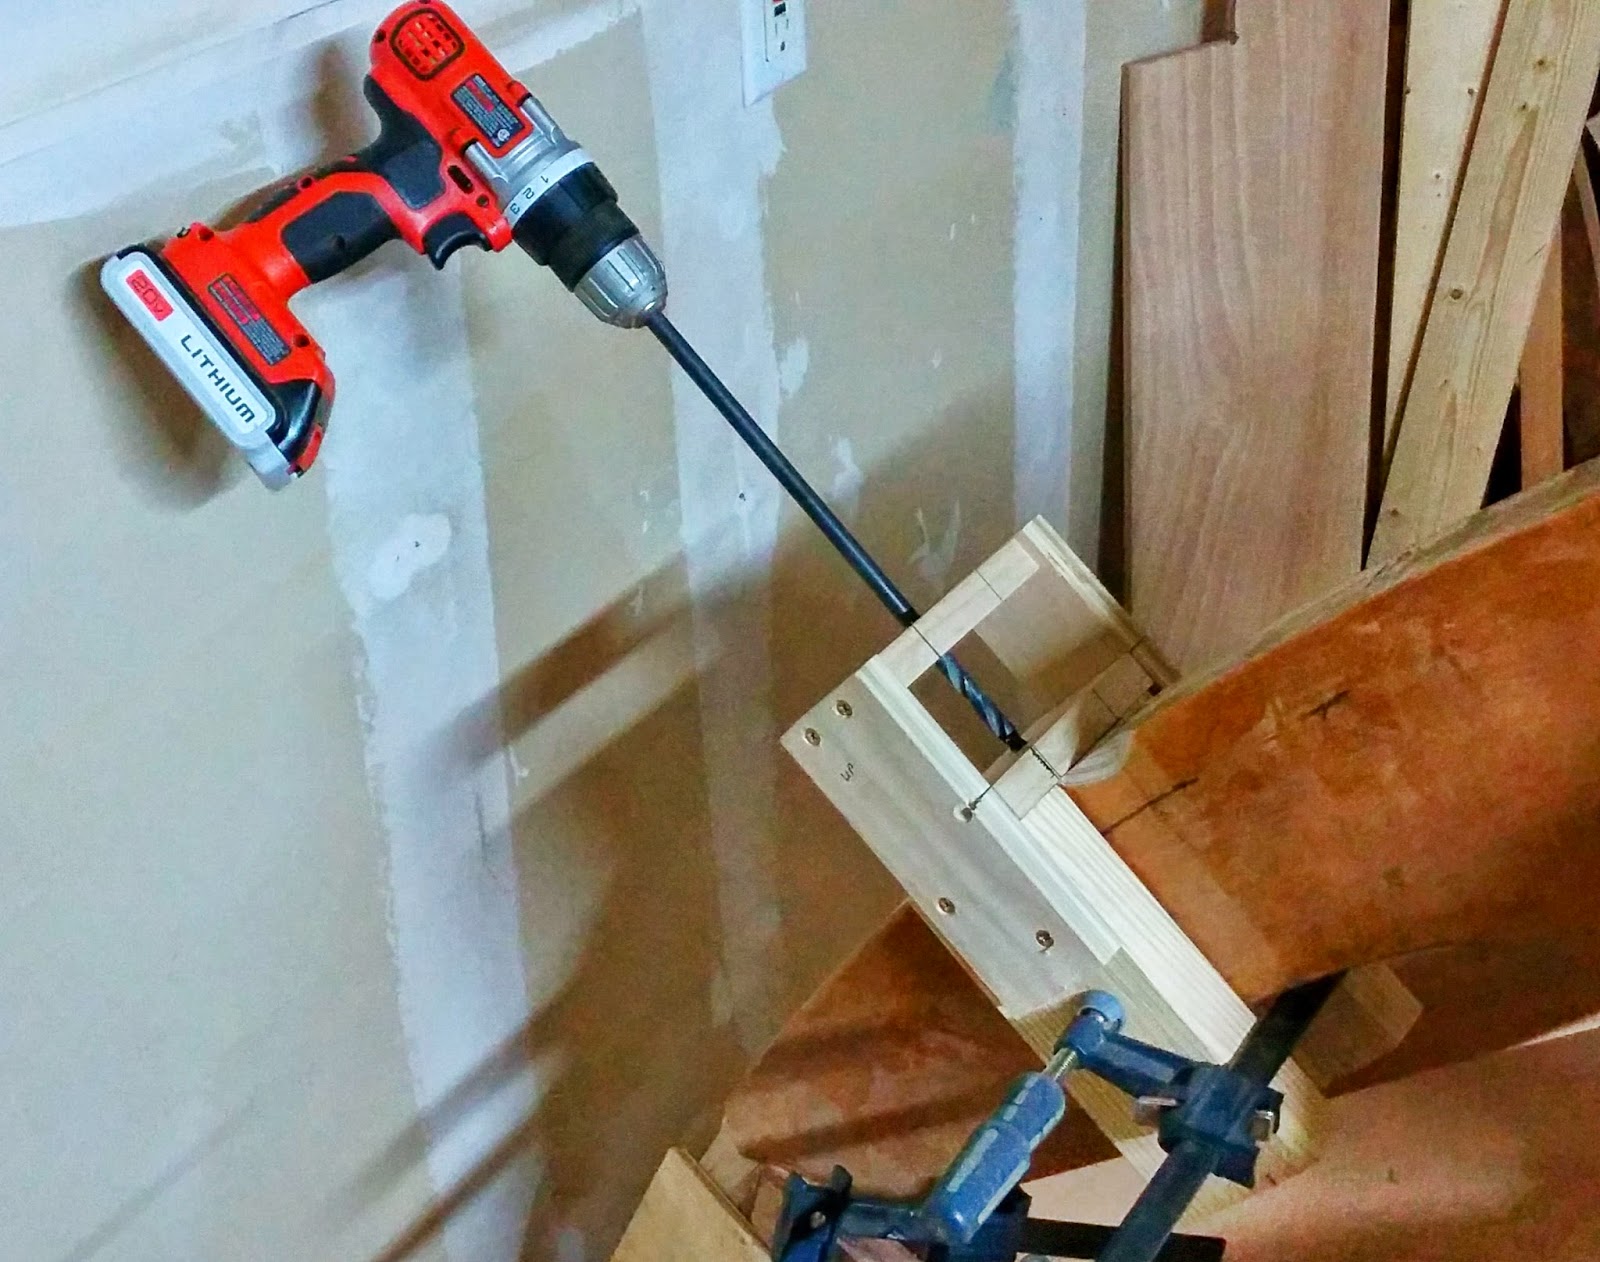
To drill the hole I made a drilling jig that clamps over the stem .It has two horizontal pieces that the drill fits through to keep the drill bit straight when drilling.

After the hole was drilled, I wanted to make it a stronger fit as well as protect it from any future water intrusion. So using a 5/8" speed bore, I slowly drilled down through the existing 3/8" hole until I had made the entire hole a larger size. In retrospect, I should have just drilled the larger hole without drilling the 3/8" hole first. It would have been easier.
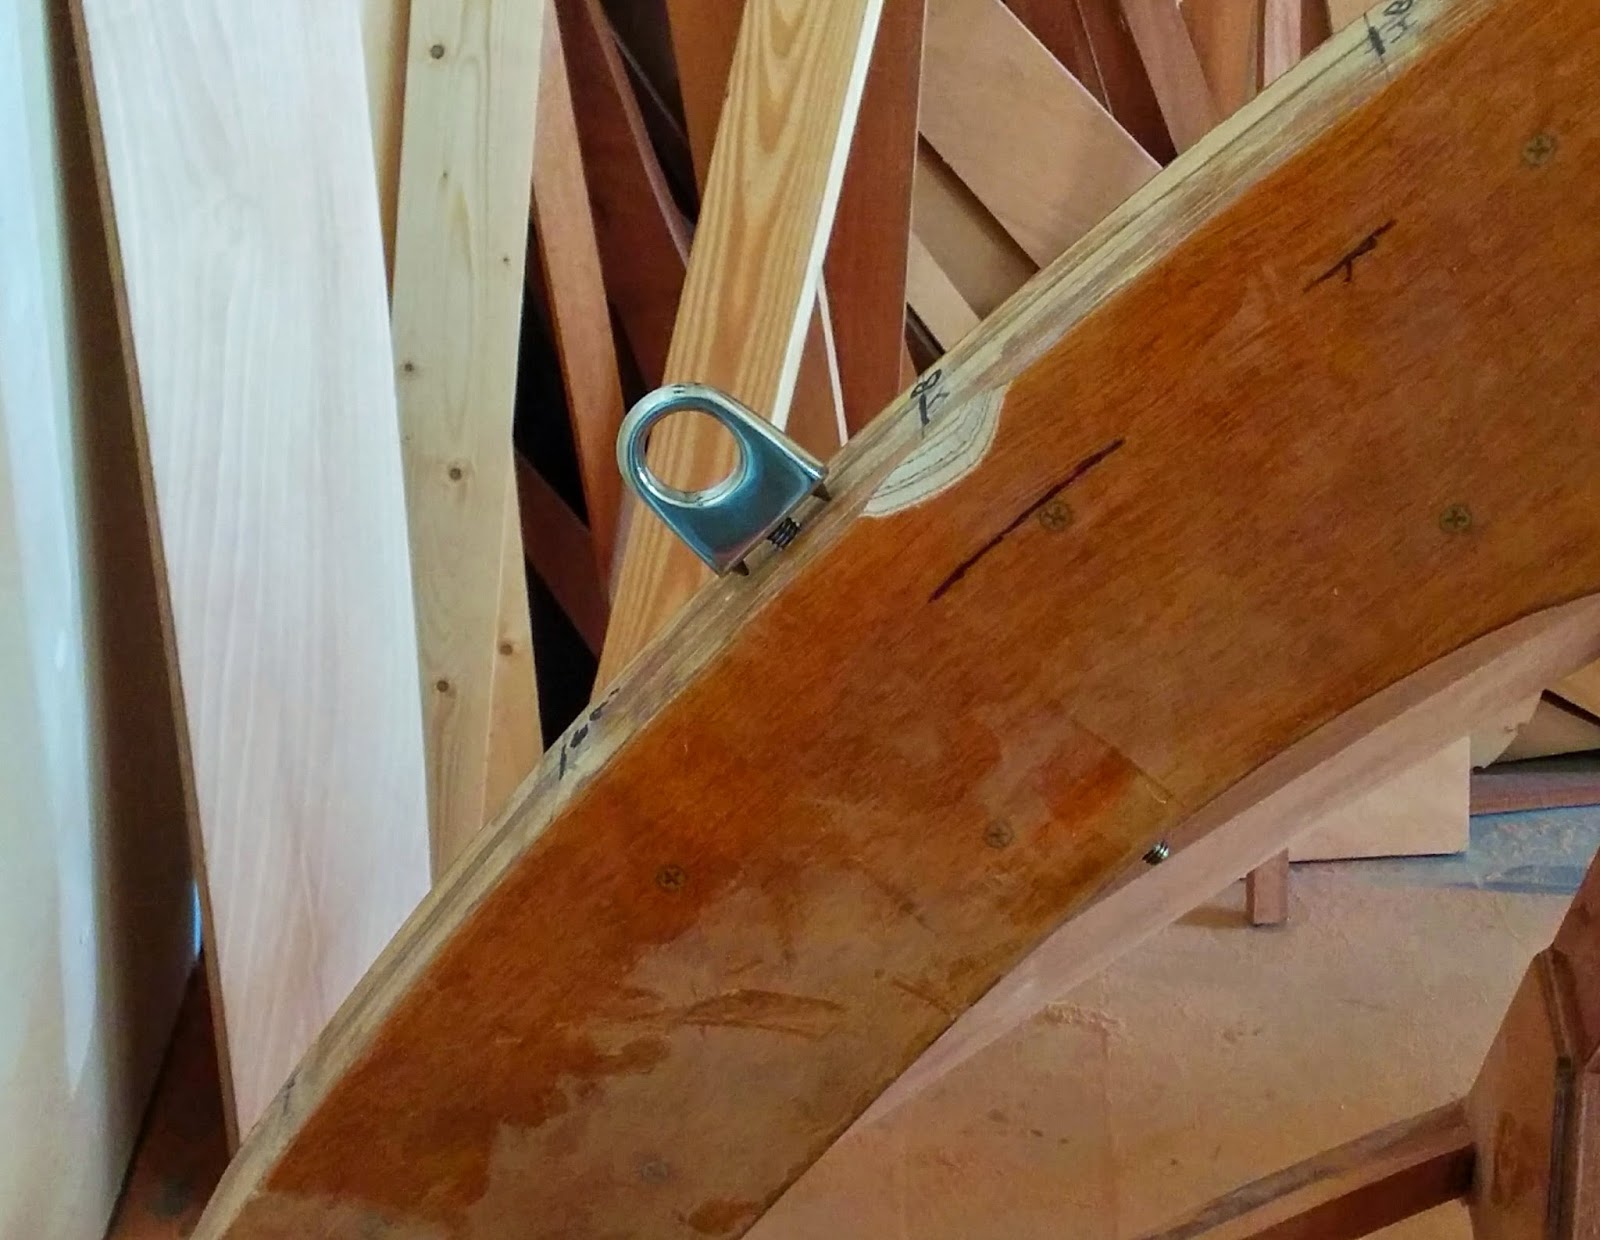
Then I filled the entire hole with thickened epoxy and let it set up overnight. The next day I drilled down through the center of the epoxy using the drilling jig. For now, thats all that will be done. I will fair this area and continue with mounting the skins. But the next photo shows what this will look like later when its mounted.

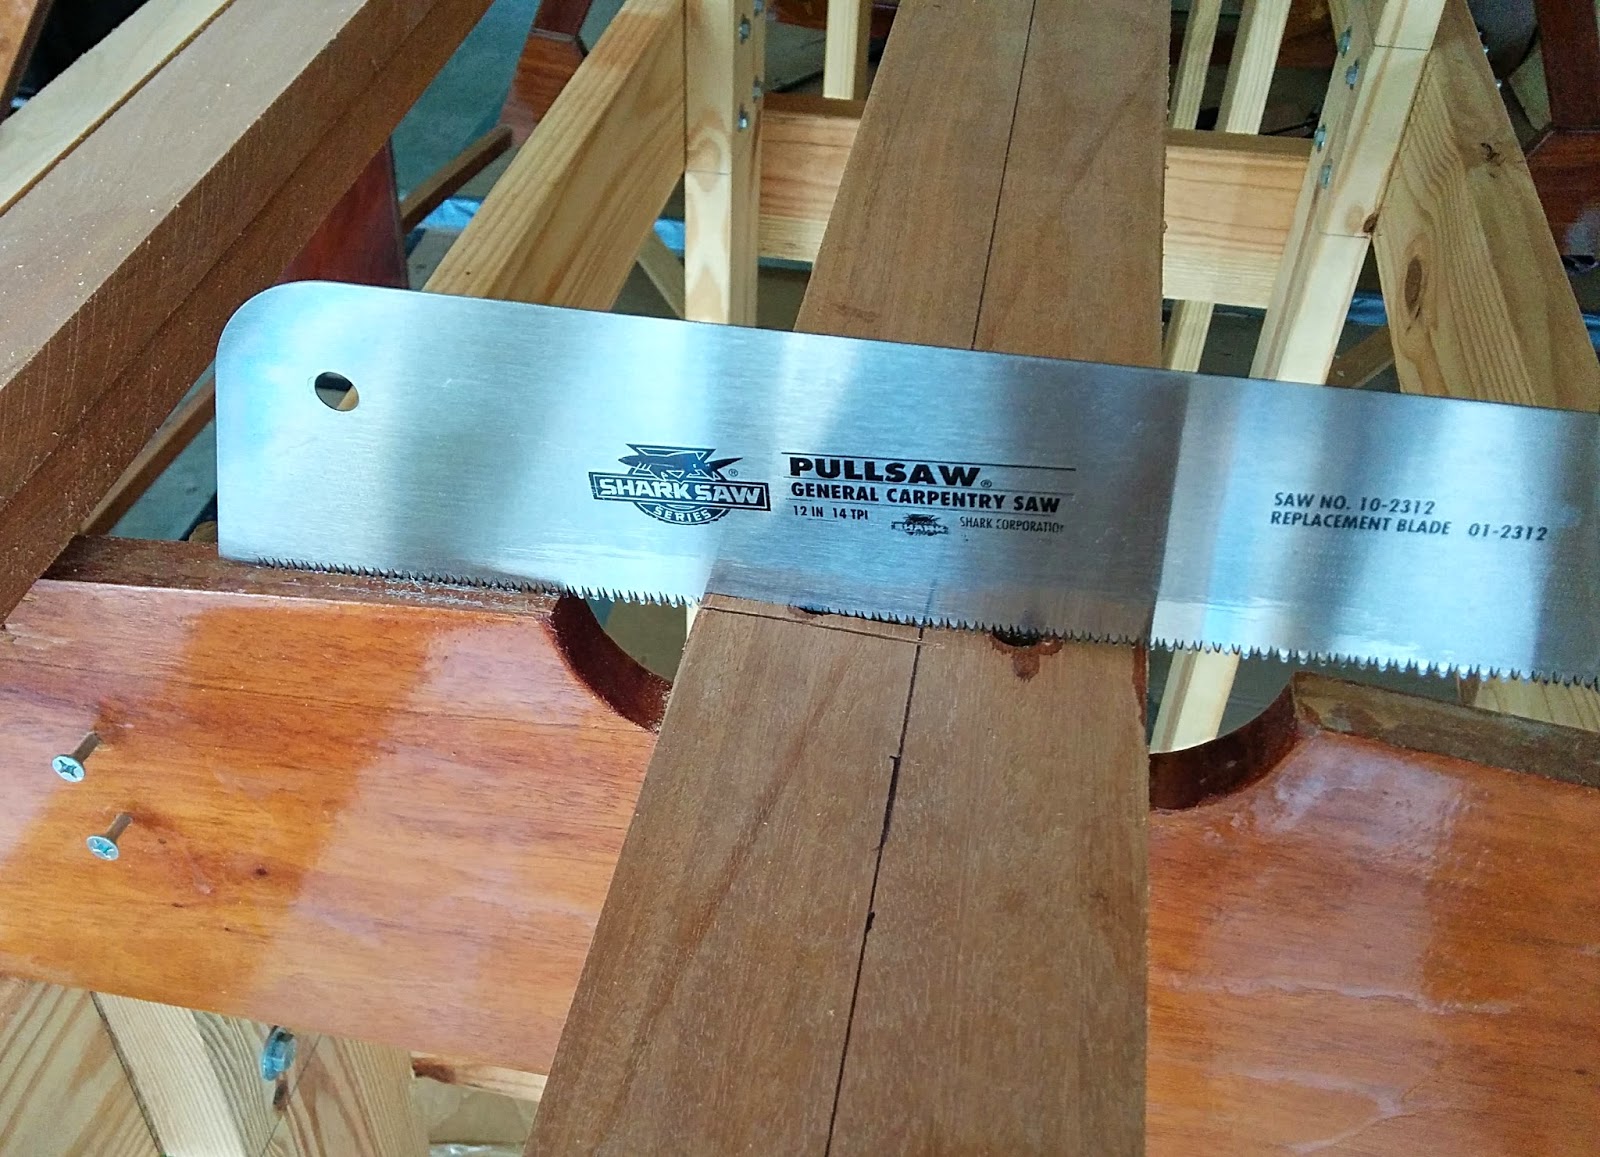
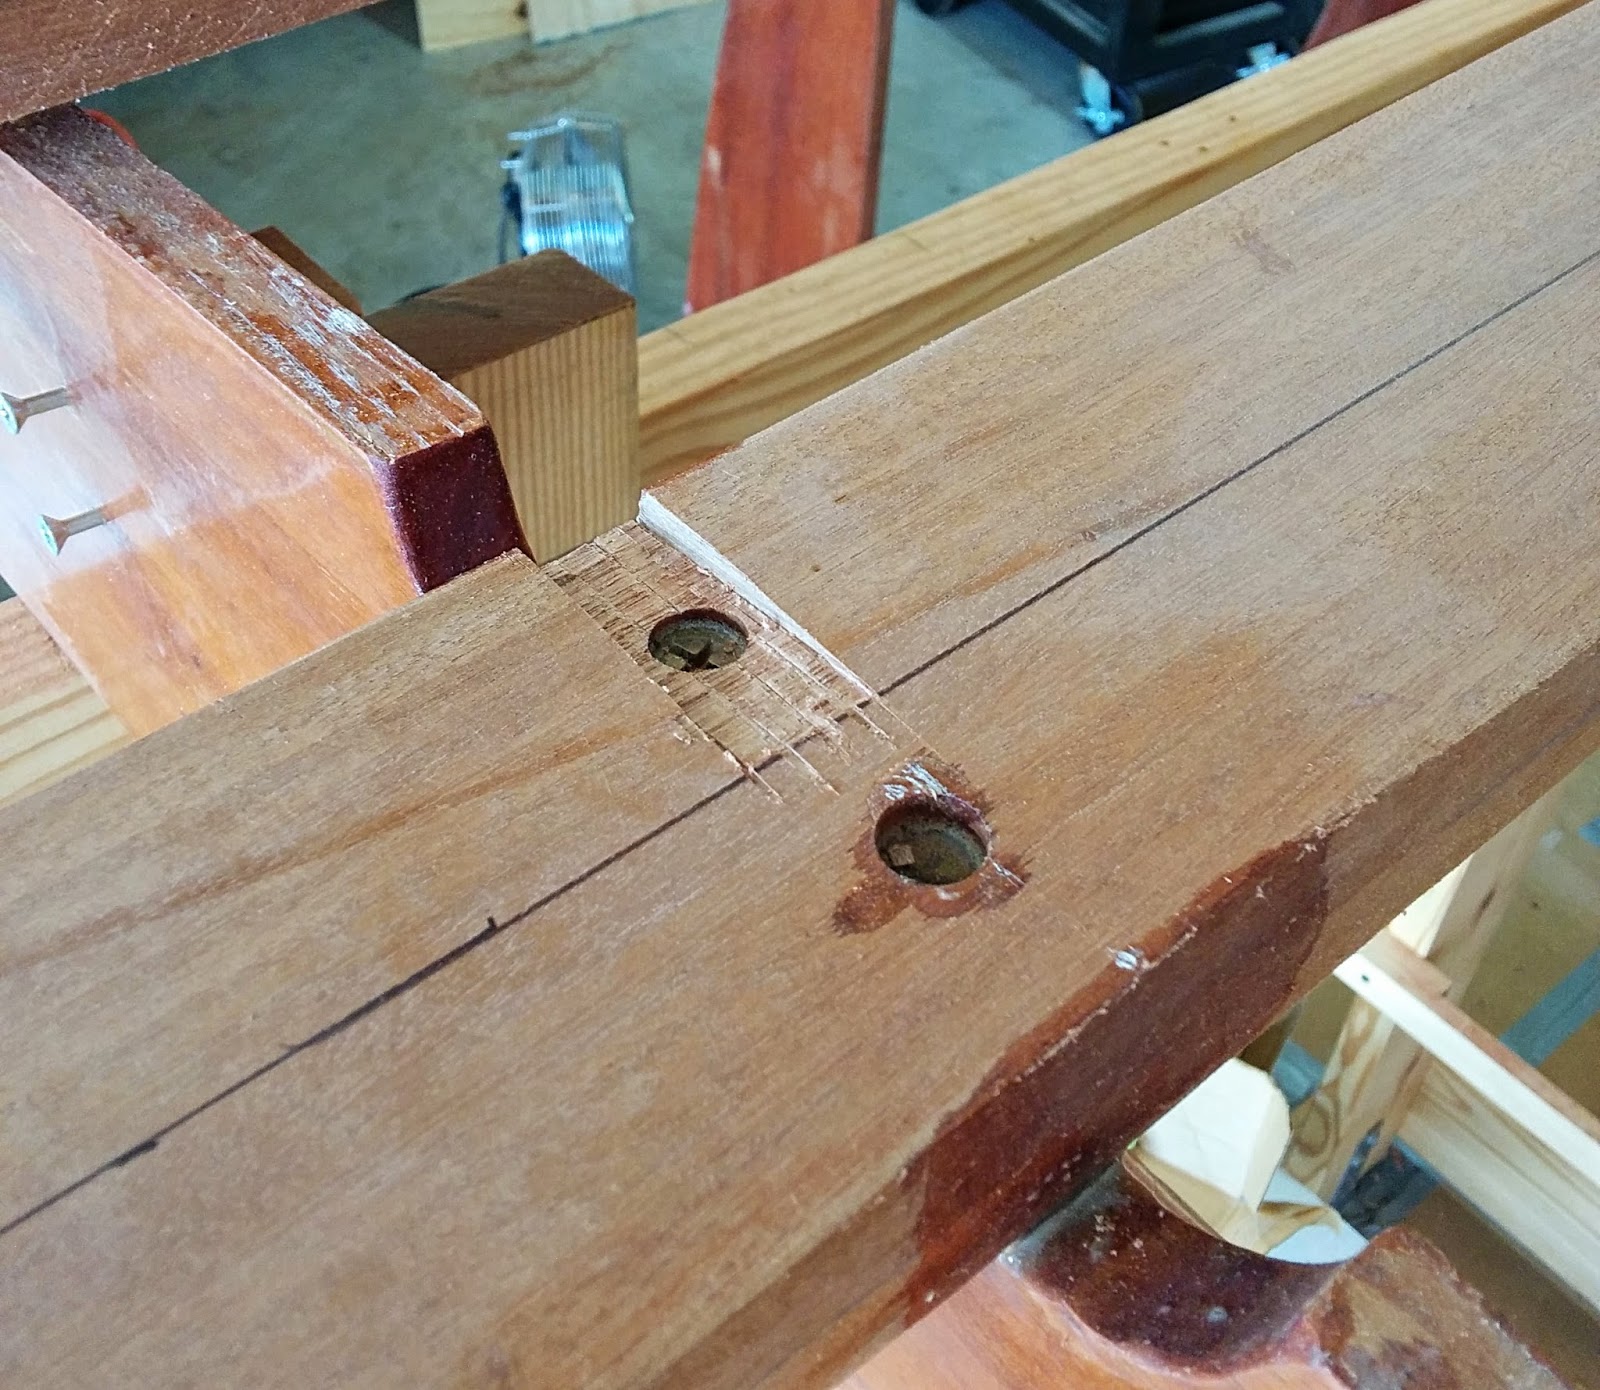
The keel fairing is being tackled in a similar manner to the chine. First I am cutting notches at the frame points that are parallel to the angles of the frames. Then I will establish fairing limits and fair the areas between the notches. Ill cover more of this process in a later posting, but I can show you the notches since they have been completed.
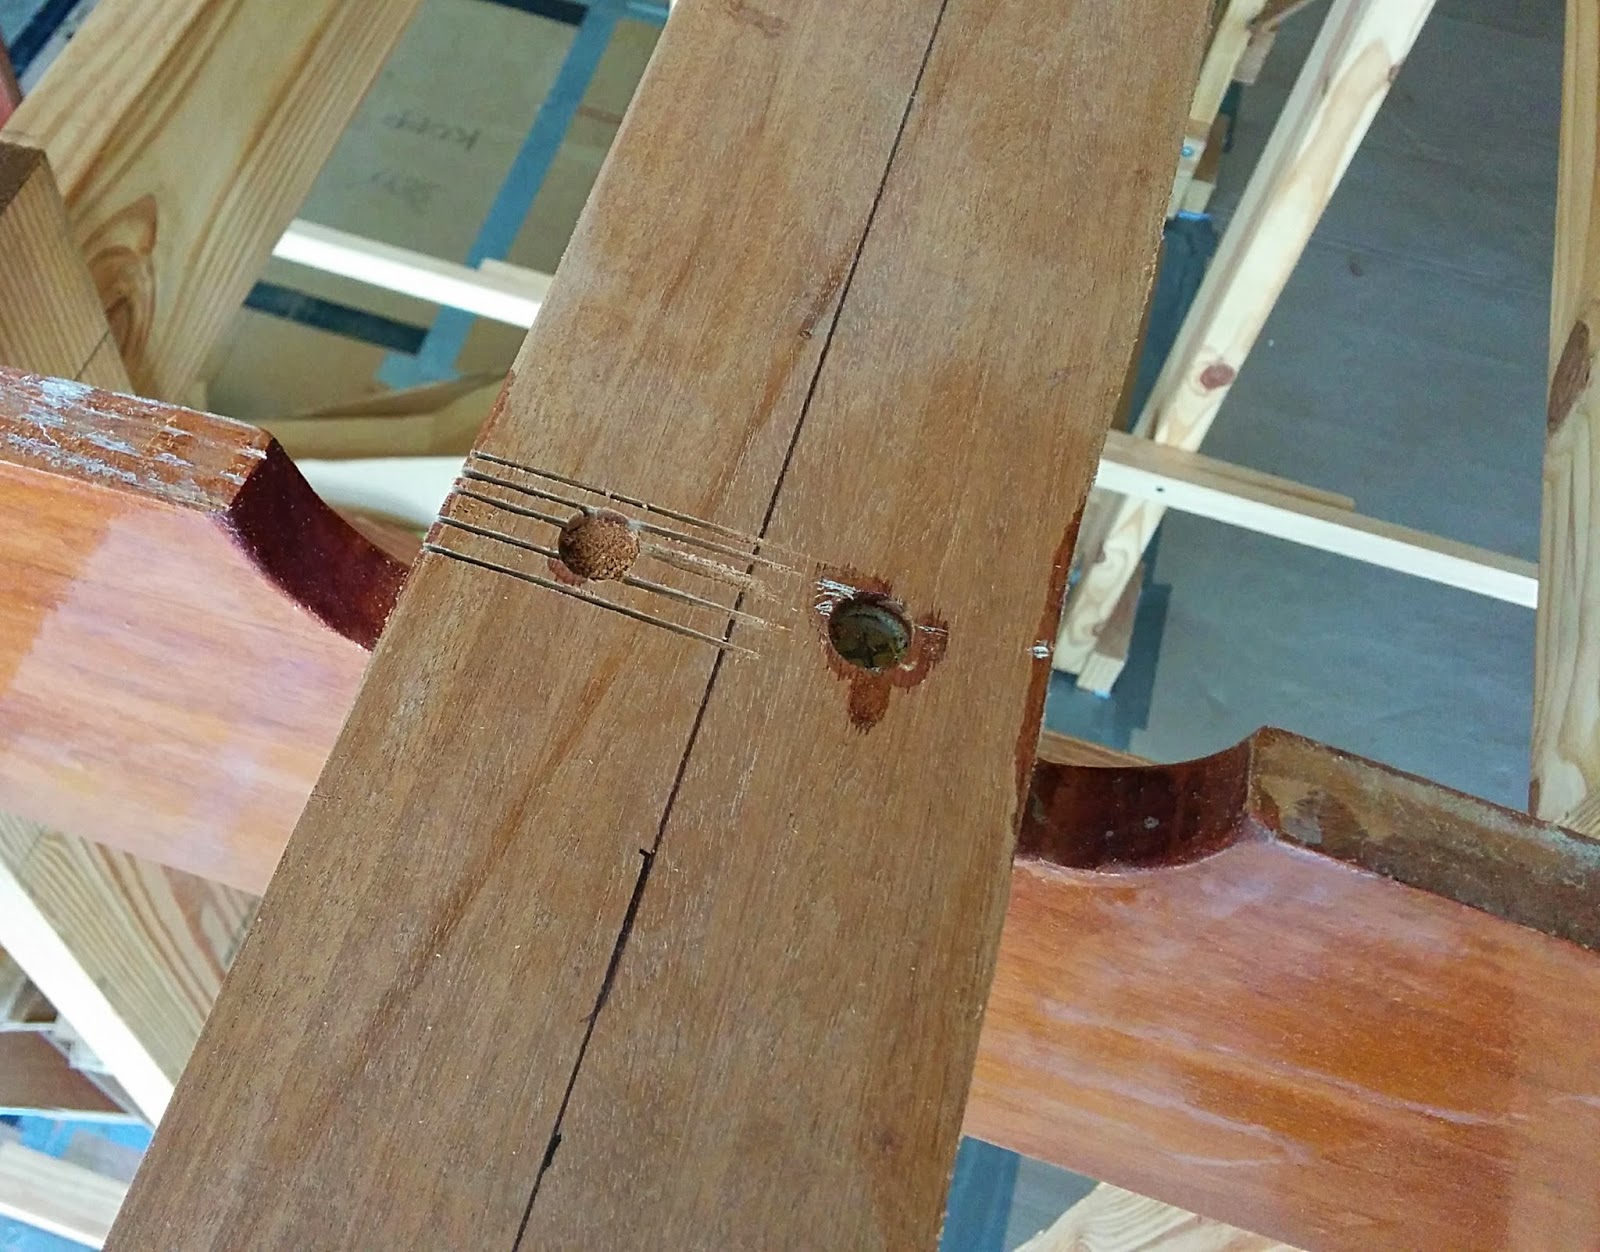
I did these notches differently than I did the notches on the chines. Instead of sanding the notches, I cut slits parallel to the frame angles, ending them at a centerline drawn down the length of the keel.


I cut several slits until the blade edge was parallel to the frame angles. Then I chiseled out the slits and cleaned them up with a file.


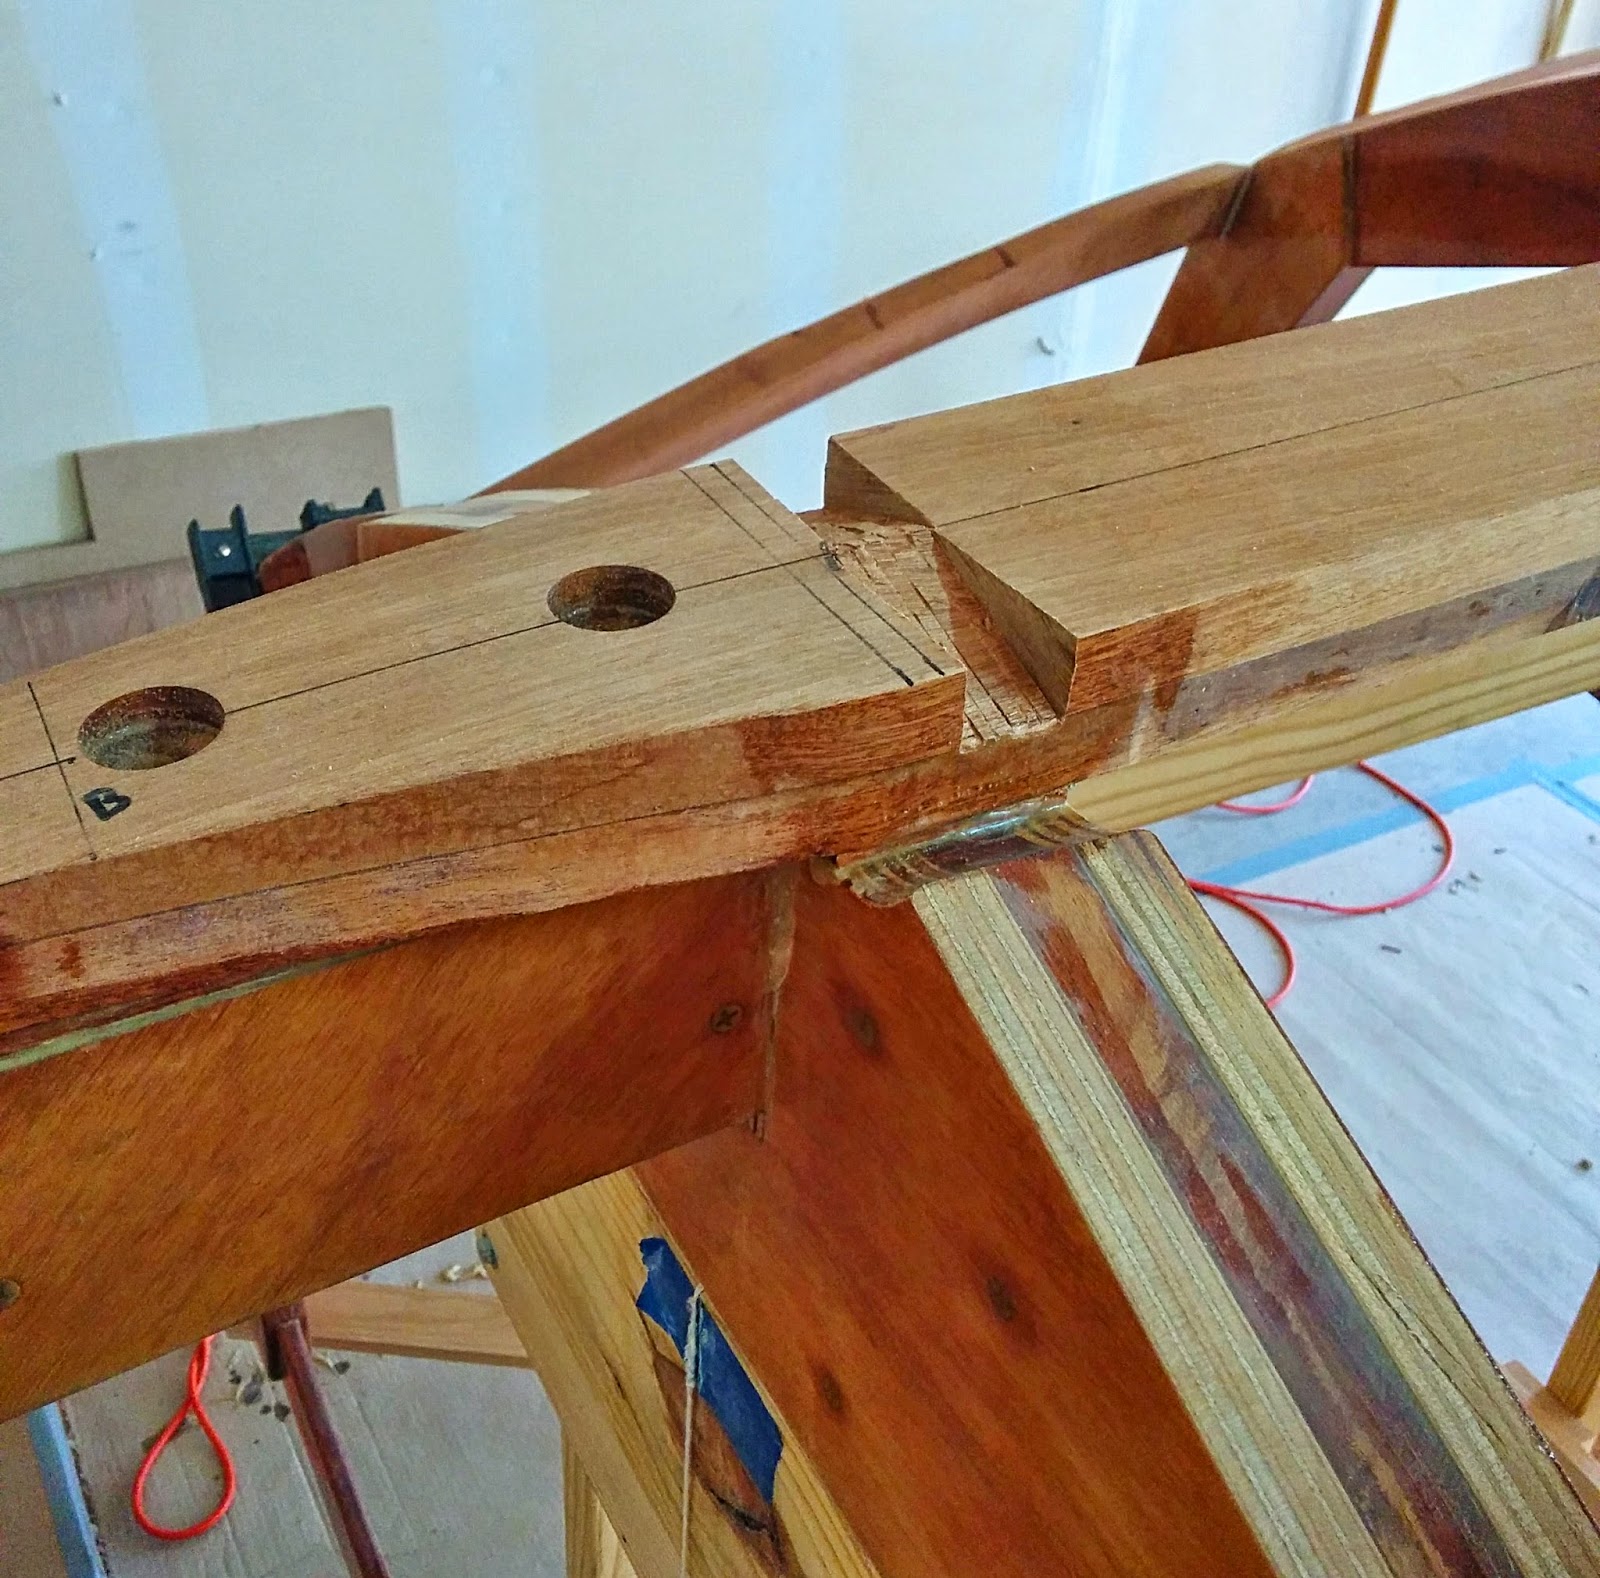
At the stem/keel junction, the angle of the frames is quite sharp and much of the keel will be faired away in this area. For piece of mind, I will be adding additional keel material on the inner surface of the keel between frames 5 and 4. Ill cover this in the next post as well.
One final note. I now have enough funds to purchase all the plywood for planking and I will be ordering that soon. Since it is quite a bit of plywood and space is limited, I am delaying the purchase until I get closer to needing it. That promises to be another adventure since I plan on scarfing some of the panels together before fitting them to the boat. I am not sure where I am going to do this since I dont really have the room for it, but I will figure out something.
So thats it for this posting. As I mentioned, the work is going rather slowly. In all fairness, I have also been spending time getting ready for selling my home in about 18 months, so that has been taking time away from this as well.
Until next time, take care.
Subscribe to:
Post Comments (Atom)
No comments:
Post a Comment